Installing a gear indicator on your motorcycle is a smart upgrade that can not only elevate your riding experience but also contribute to safety on the road. It’s a straightforward yet valuable addition for those who wish to have a visual confirmation of the gear position at any given time. By following this guide, you’ll learn how to integrate a gear indicator into your motorcycle’s system—a process that can be done efficiently, even if you don’t consider yourself a technical guru.
Introduction to Gear Indicators
What is a Gear Indicator?
A gear indicator is an accessory that delivers real-time information about the gear engaged on your motorcycle. Many modern bikes are equipped with this feature, but for those that aren’t, aftermarket gear indicators for motorcycles provide an excellent solution. It’s a particularly useful tool for novice riders still getting accustomed to the feel of their bike’s universal motorcycle transmission.
Benefits of Installing a Gear Indicator
Adding a gear indicator benefits you by offering a visual reference of your current gear, thus allowing you to make better riding decisions without second-guessing. Knowing what gear you’re in can help prevent stalling, reduce the strain on the engine, and can be extremely helpful when riding in stop-and-go traffic. It’s also a fantastic aid in maintaining fuel efficiency, as it encourages riding in the proper gear at all times.

Pre-Installation Considerations
Compatibility with Your Motorcycle
It’s critical to ensure that the gear indicator you choose is compatible with your bike’s specific make and model. Not all gear indicators are universal, and you’ll need one that aligns with your bike’s system—especially important if you ride a bike with a unique universal motorcycle transmission design.
Tools and Materials Needed
When preparing for the installation of a gear indicator on your motorcycle, having a detailed motorcycle gear indicator wiring diagram can be a massive help. This diagram will guide you through the connections necessary to integrate the indicator with your bike’s transmission system. Along with the wiring diagram, you’ll need a set of tools and materials which may include the following:
| Tool/Material | Purpose |
|---|---|
| Gear Indicator Kit | Contains all necessary components, including the display |
| Wire Strippers/Crimpers | To modify and connect wires to match the wiring diagram |
| Electrical Tape/Heat Shrink | For securing connections, as indicated in the manual |
| Screwdriver set | To open panels and secure the gear indicator |
| Zip Ties | To organize wires along the frame as per the wiring diagram |
| Multimeter | To ensure electrical connections are solid |
| Installation Manual | Generally includes a motorcycle gear indicator wiring diagram |
Having these tools on hand prior to beginning work on your motorcycle ensures a smoother installation process.
Safety Precautions
Always disconnect your motorcycle’s battery when working on electrical components to prevent potential shorts or shocks. Doing this while following your motorcycle gear indicator wiring diagram will ensure that you are taking the necessary steps safely.
The Step-by-Step Installation Process
Locating the Installation Area
Preparing the Workplace
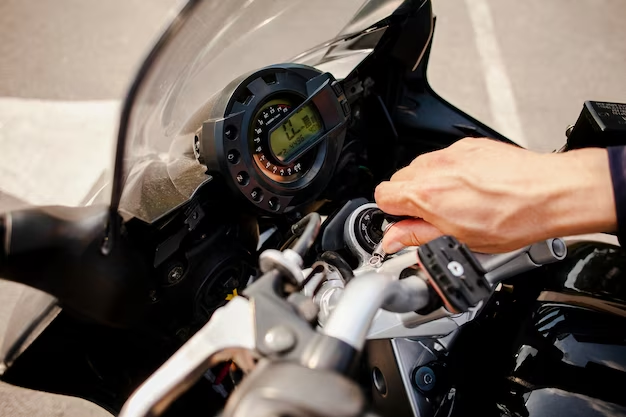
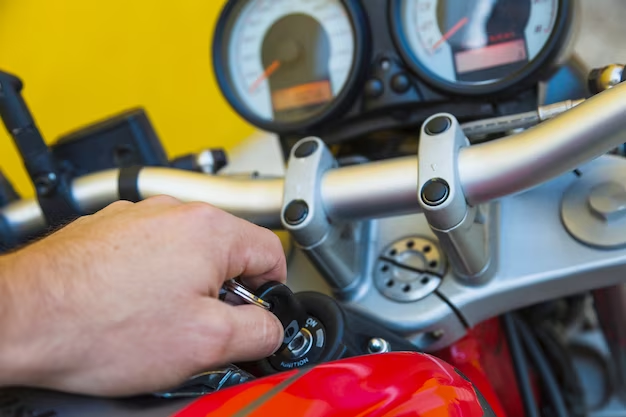
Selecting the right area to mount the gear indicator is crucial. An ideal location is visible to you while riding without obstructing your view of other essential instrument gauges. Once the spot is selected, make sure it is clean and ready for the gear indicator installation.
Connecting the Wires
Identifying the Gear Position Sensor
Referencing your motorcycle’s service manual, find the gear position sensor—this will be critical for those installing an arduino gear shift indicator, which requires precise connections. Identify and mark the wires leading from the sensor as these will be extended to your gear indicator.
Routing the Wires Safely
Use zip ties to properly secure the indicator’s wiring along your bike’s frame. Here are the steps for safe wire routing:
- Plan the route from the indicator to the gear position sensor, referring to the motorcycle gear indicator wiring diagram for guidance.
- Ensure that the path avoids heat sources and moving parts, securing the wires with zip ties.
Mounting the Gear Indicator
Securing the Display
After routing the wires safely, your next step is to mount the gear indicator display. Depending on the design of the indicator you’ve chosen, the mounting methods can vary. Some use a simple adhesive backing, while others may require you to secure them with screws. If using adhesive, ensure the mounting surface is clean, dry, and free of oils for the best adhesion. For screw mounts, carefully mark and drill any necessary holes, being attentive not to damage any underlying components. It’s crucial that the display is firmly attached and remains readable in various lighting conditions.
Finalizing the Mount
Finalizing the installation involves ensuring that your wires are neatly tucked away. A common practice to achieve this is to use zip ties to secure the wires along the frame, following the existing wire loom where possible to keep the appearance tidy and professional.
Calibration and Testing
Calibrating the Gear Indicator
With everything connected and the gear indicator in position, it’s time to calibrate the system. Calibration procedures can differ, so it’s essential to follow the instructions that come with your gear indicator kit. In general, you may need to cycle through the gears while the bike is stationary to set the indicator to recognize the correct gear positions. This step ensures that the display will accurately reflect the actual gear in use.
Testing for Functionality
After calibration, it’s time to test. Reconnect your motorcycle’s battery and power on the bike. Go through each gear to confirm that the indicator is displaying the correct gear as you shift. It’s crucial to note any discrepancies now before taking your motorcycle out for a real-world test ride.
Maintenance and Troubleshooting
Routine Checks and Maintenance Tips
- Regularly inspect the gear indicator’s wiring, looking for signs of wear, fraying, or loose connections.
- Clean the display as needed to ensure visibility, avoiding harsh chemicals that could damage the screen.
Like all electronic devices, the gear indicator will perform best when properly maintained. These checks help extend its lifespan and ensure consistent performance.
Common Issues and How to Troubleshoot Them
If you face any issues with the gear indicator after installation, there are a few common troubleshooting steps to go through. First, ensure that all connections are firm and secure. If the display is erratic or incorrect, re-calibrate the indicator according to the manufacturer’s instructions. If problems persist, consulting the troubleshooting section of your installation manual, or seeking help from a qualified technician, may be necessary.

Conclusion
Installing a gear indicator can significantly enhance your motorcycling experience. It provides real-time gear information, allowing for smoother and safer riding. By following this detailed guide, you can perform the installation yourself, understanding the wiring, mounting, calibrating, and testing phases—all key components to ensure the successful integration of a gear indicator on your motorcycle.
FAQs
Do gear indicators need to be programmed for specific motorcycle models?
Yes, gear indicators typically require programming or calibration to ensure compatibility with your motorcycle’s gear position sensor and transmission settings.
Can I install a gear indicator on any motorcycle?
While most motorcycles can accommodate a gear indicator, you must check for compatibility with your bike’s make and model before purchasing.
What should I do if my gear indicator is not displaying the correct gear?
If the indicator is not displaying correctly, re-calibrate the indicator following the manufacturer’s instructions. If that does not resolve the issue, double-check your wiring connections.
How can I ensure the gear indicator is visible both day and night?
Choose a gear indicator with a backlit display or one that adjusts brightness according to ambient light conditions to ensure visibility at all times.
What is the best way to route the wires to avoid potential damage?
Follow the existing wiring loom of your motorcycle as closely as possible, using zip ties to secure the wires away from hot, moving, or sharp components.